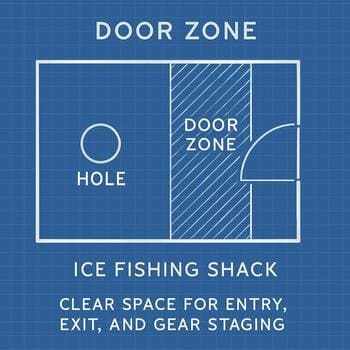
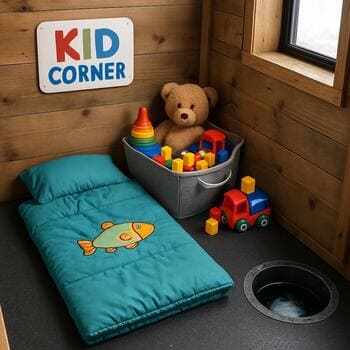
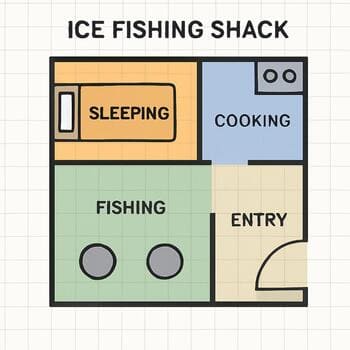
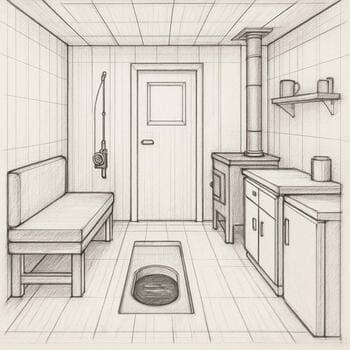
Skip to layout content

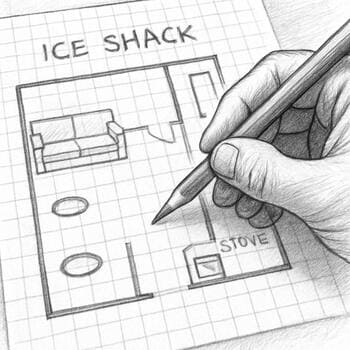
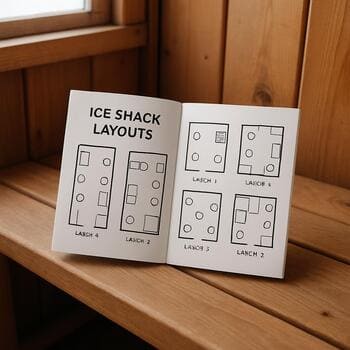
Cabin layout library

A small library of ice shack floor cards

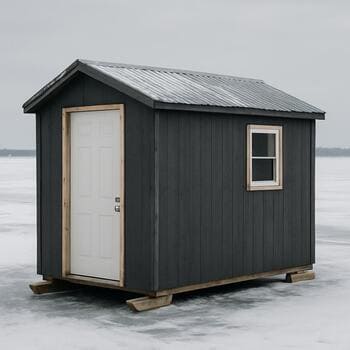
This page is not a catalogue of gear. It is a shelf of floor-plan cards: tiny solo grids, family bunk rings and hard-working crew bases that you can print, annotate and tape to cabin walls.

Each layout card shows the quiet parts of a shack as carefully as the fishing holes: where boots dry, where lantern heat flows and where wet ropes sleep between trips.

  • Layout lanes tuned for real hole positions, not perfect drawings.
  • Bunk, stove and door placements that keep the warmest spots useful.
  • Quick presets you can print, sketch over and adjust after each trip.

Map three cabin zones before you draw a single line

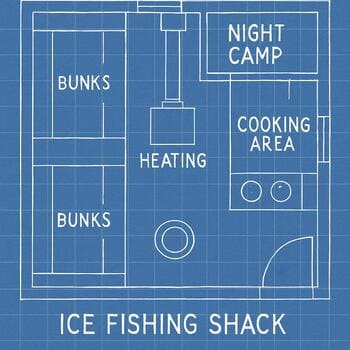
Door, hole and bunk zones define how far bodies, gear and steam move in the room.

Door zone

Short landing pad for boots and tubs so cold air stays in one slice of the cabin.

Hole lane

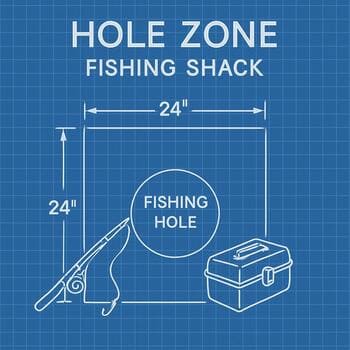
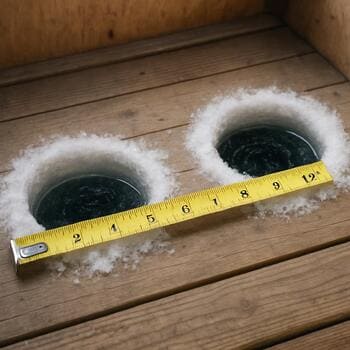
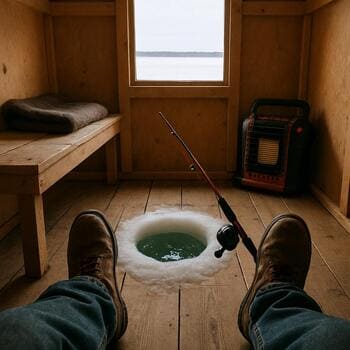
Clear strip around the ice holes where nothing hangs or drags across lines.

Rest pocket

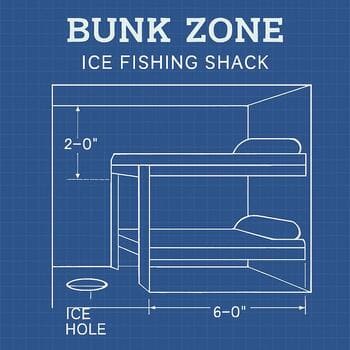
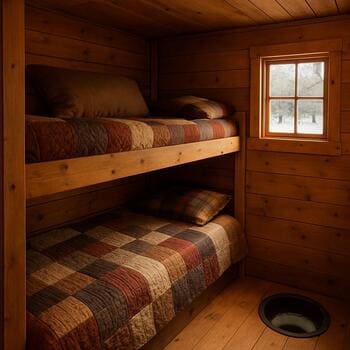
Quiet corner with bunks and a small shelf for lights and books.

Work desk

Tiny table for sonar, logbook and maps, close to power but away from wet floor.

Cabin grid highlighting the door and landing zone near the entrance
Door zone highlighted as a short strip that absorbs snow and tubs.
Cabin grid with a bright ring showing safe hole space
Hole lane marked so seats and rods never block the circle.
Cabin layout diagram showing bunk zone separated from holes
Rest pocket tucked away from the coldest draft.

Use simple ribbons to keep holes spaced and safe

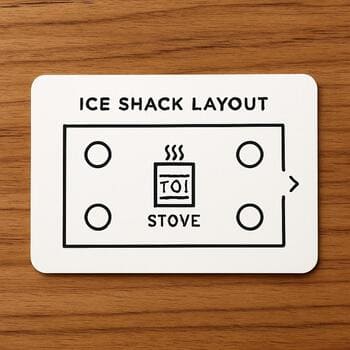
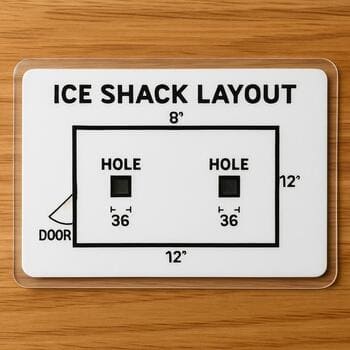
Three quick patterns show how far holes sit from each other and from the walls of the shack.

  • Straight pair for tight solo setups with two rods in reach.
  • Triangle pattern for families that like to fish in a loose circle.
  • Offset line when you expect guests to walk through the cabin at night.
Two drilled ice holes with a tape measure stretched between them
Measure one comfortable reach and reuse it on every new layout.
Triangle layout of three ice holes marked on a fresh snow surface
Triangle pattern keeps lines apart while people face each other.
Small safety flags placed near cracks to mark safe distance for a shack
Flags show how far the cabin should sit from visible cracks.

Three solo pods for long, quiet sessions

Each pod keeps one person close to the holes, stove and notebook without feeling boxed in.

Desk watcher

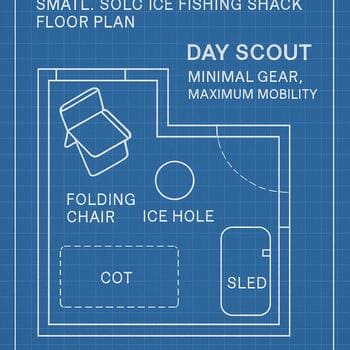
One chair, one desk, two holes at arm's length.

Inside view of a solo ice shack with a chair, small desk and two holes
Desk pointed at the sonar screen with the stove behind the chair.
  • Notebook shelf
  • Low lantern
  • One gear tub

Bunk corner

Bunk pressed along the wall, holes close but never under the pillow.

Solo ice shack at night with a bunk, lantern and two fishing holes
Lantern hangs between bunk and hole lane to keep shadows soft.
  • Soft wall pocket
  • Extra blanket hook
  • Slipper box

Pack & go pod

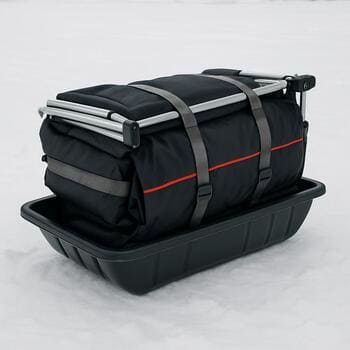
Everything staged on one side so the cabin can be packed in a single sweep.

Solo ice shack layout after fishing with gear stacked by the door
Gear stack lives near the door, leaving the rest of the floor clear.
  • Door tub tower
  • Folded chair niche
  • Dry boot rail

Family strips that keep kids close but lines clear

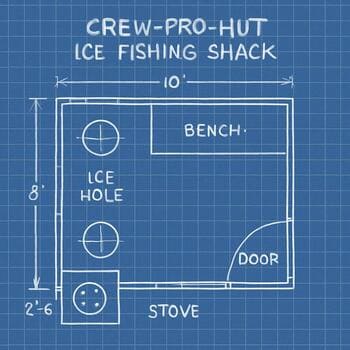
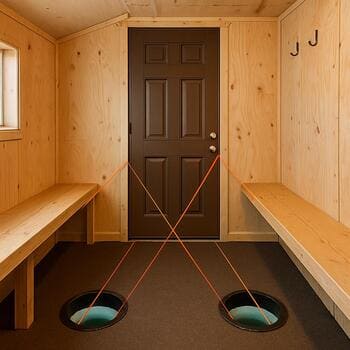
Two benches, a table and the hole lane can be arranged in three ways depending on how much motion you expect.

Calm movie strip

Long bench faces the wall, holes sit behind the backs and a small screen hangs by the ceiling.

Family ice shack interior with a long bunk and holes behind the seats
Bench backs shield kids from the cold door when it swings open.

Face-to-face table

Benches run along both walls with a narrow table in the middle and two holes at the ends.

Family layout with benches on both sides of a narrow table in an ice shack
Table holds snacks and cards so hooks never land on the floor.

Play nook strip

One end of the bunk becomes a soft corner for drawing while adults fish at the far holes.

Ice shack corner with cushions and toys near a bunk in a family layout
Small play nook keeps toys out of the walking lane.

Build a crew base with one clean flow line

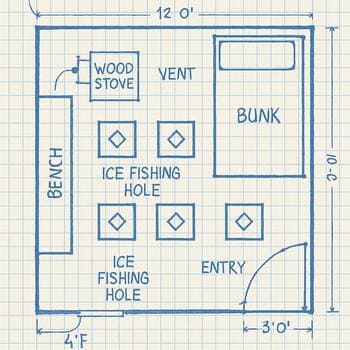
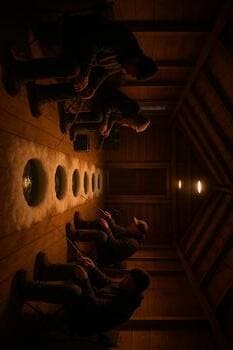
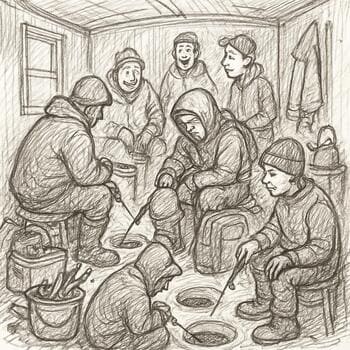
When four or more people share a shack, one invisible line should guide every step from door to stove.

  1. Sleds stop at a fixed point outside so snow falls there, not near the bunks.
  2. A narrow walk lane passes the stove and hole zone without sharp turns.
  3. Dry rack and hooks sit near the exit so wet gear leaves first.
One shared path No gear islands Dry exit corner
Overhead view of a crew ice camp with sleds parked in one line
Sleds line up in a single row to keep the door side clear.
Crew ice shack interior with a straight line of fishing holes and benches
Benches and holes follow one long line from wall to wall.
Drying rack with jackets and gloves near the exit of a crew ice shack
Drying rack sits by the exit so thawing gear never blocks the lane.

Let layouts slide from day scout to night camp

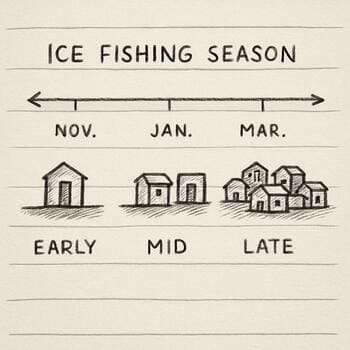
A simple ladder shows how the same grid shifts when lights dim, heaters rise and people slow down.

  1. Scout pass

    Gear leans on one wall, holes stay open and bunks stay folded so you can move again fast.

  2. Settle in

    One bunk drops, a small table opens and the stove moves out of the walk lane.

  3. Night hold

    Floor stays clear, only two holes stay active and lanterns shift toward the bunks.

Cabin grid showing a light daytime scouting layout with folded bunks
Day scout grid with bunks folded and sled path open through the shack.
Cabin grid showing a night layout with bunks open and fewer active holes
Night camp grid keeps only two holes lit while bunks and stove hold the warm side.

Rotate the door until the draft lands in the right place

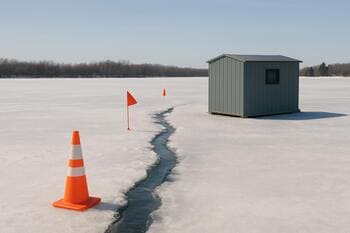
Three door directions change how snow, wind and visitors move through the cabin.

Long-wall entry

Door on the long wall gives more landing room for tubs and keeps the stove out of the first gust.

Ice shack with a door cut into the long wall and sleds parked along it
Long-wall door shares space with sleds but leaves bunks untouched.

Cross-wind corner

Door faces light cross-wind so gusts slide past the hinges, not straight into the bunks.

Short-wall night entry

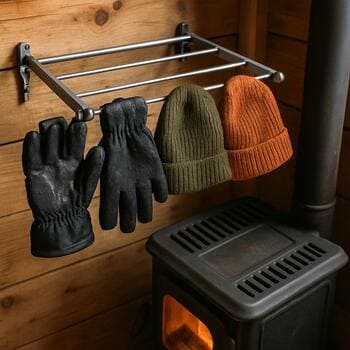
Short-wall door close to the stove makes late-night exits warmer and quicker.

Night view of an ice shack with a door in the short wall glowing onto the snow
Short-wall entry glows onto the snow and keeps the warmest air near the door.

Tune bench height so rods, backs and boots agree

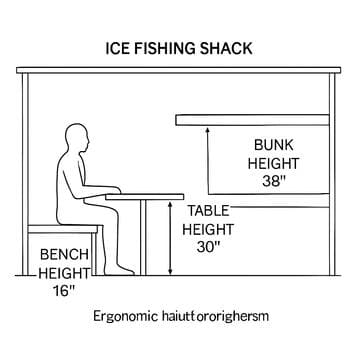
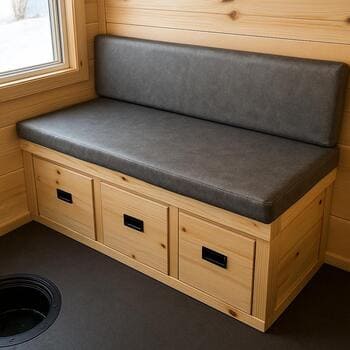
Small changes in seat height decide whether people sit straight, lean over the holes or kick every bucket.

Low, relaxed bench

Feet stay flat, backs lean into the wall and holes sit at arm level.

Mid utility bench

Good for switching between fishing, eating and quick naps.

High gear bench

Storage below stays dry and deep, but you only sit here for short stretches.

Side view of three different bench heights drawn along an ice shack wall
Side sketch marks where knees and elbows land at each bench height.
Bench in an ice shack opened to show storage compartments underneath
Storage bench opens from the top so tubs stay reachable but out of the lane.

Stack layout layers instead of redrawing every time

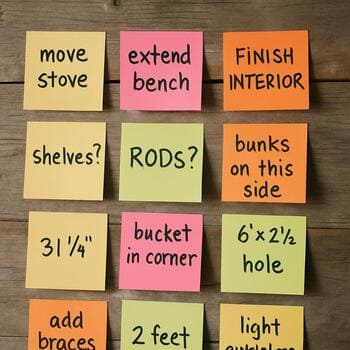
Start with pencil lines for walls, then add zones, holes and furniture on thin transparent layers.

Base grid

Bare rectangle with only door and window marks.

Zone overlay

Soft color blocks for door, hole and rest zones.

Furniture pass

Bunks, stove and desk outlines appear last so they respect the earlier layers.

Pencil outline of an ice shack on grid paper with door and bunks
Pencil-only base grid keeps walls and openings clear.
Ice shack grid with colored zones for door, bunk and hole areas
Color overlay adds warm, cold and walk lanes without new lines.

Turn favorite layouts into pocket cards

One card holds the grid, the second card holds a short note on how the cabin felt in real weather.

  • Print two or three cards per season and keep them in your box.
  • Mark wind, ice thickness and how the stove behaved.
  • Swap cards as your shack changes over the winter.
Printed ice shack layout card on a wooden table with a pencil
Simple card with grid, door arrow and date at the top.
Laminated pocket card with an ice shack layout clipped to a parka
Laminated pocket version rides on your jacket all season.

Use string lines and tiny marks to keep layouts honest

A few pieces of tape and one stretch of string show how people and air really move through the shack.

Interior of an ice shack with string lines showing the path from door to holes
String from door to stove shows whether boots cross rods on busy days.
Small tape dots on an ice shack wall marking hook, light and shelf positions
Tiny tape dots record the best spots for hooks, lights and shelves.

Join cabins into small camp clusters on the ice

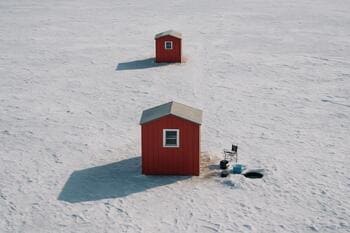
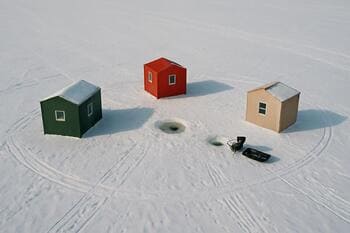
Two or three shacks can share paths, lights and a single gear hub if you draw their footprints as one camp instead of three islands.

Two-shack working lane

Sleeper shack sits upwind, cook shack sits downwind, and sleds run in a straight lane between them.

Three-shack ring

Sleep, cook and gear cabins form a loose ring so you can step out of any door and still see the others.

Diagram of two ice shacks in a line with a sled lane between them
Two-shack line shares one bright path and one lantern pole.
Top view of three ice shacks forming a ring on a frozen lake
Three-shack ring wraps the windiest side with the gear cabin.

Run a quick autopsy on layouts that felt wrong

Instead of guessing, circle where people tripped, shivered or never sat, then sketch a second version right next to it.

Overcrowded ice shack sketch with crossed arrows and cramped hole positions
Crowded first draft: arrows show how many times people crossed the same tight corner.
Improved ice shack layout sketch with clearer walk lanes and moved stove
Second pass moves the stove and opens a clean lane from door to bunks.

Draw an end-of-day pack map for every layout

The best cabin drawings already know where tubs, rods and trash will land when you decide to leave.

  • Mark a sled parking spot and a short line to the warmest door.
  • Give every tub a square on the floor so nothing floats in the walk lane.
  • Add a tiny icon where last-minute checks happen before lights go out.
Clear exit lane Dry tub zone Final check dot
Overhead sketch of a sled path from cabin door to car on the ice
Pack map shows the sled path before snow and darkness hide it.
Notebook on a small cabin table with end-of-day layout notes
Short notes after each session keep the next layout honest.

Keep a season timeline of how each layout evolves

One narrow strip on the wall tracks when you changed bunks, doors or hole lanes and what the ice felt like that day.

  1. Early clear ice

    Light gear, wide walk lanes and door facing the rising sun.

  2. Mid-winter grind

    Extra blankets, smaller hole set and stove pushed deeper into the warm corner.

  3. Late-season melt

    Short sessions and layouts tuned for quick pack-downs.

Notebook page with a vertical season timeline and small cabin layout thumbnails
Timeline page lines up layouts with dates, wind and ice notes.
Row of sticky notes on a cabin wall, each with a simple layout sketch
Sticky notes on the wall show which layout you liked on which trip.
Small layout guide booklet lying on a wooden cabin bench
Pocket guide sums up the best cabin layouts from this page.
Closeup of an ice safety and layout checklist page with tick marks
Checklist page links layout choices to real ice checks.

Turn layouts into on-ice checklists and calm routines

When each drawing connects to a short list of checks, your camp feels less rushed and more repeatable.

  • Pair every cabin layout with three simple ice rules.
  • Print one copy for the shack wall and one for your pocket.
  • Update the list after every trip instead of every season.